WebDriver is a tool for automating web application testing, and it tests that everything is working fine. It aims to provide a friendly API that’s easy to explore and understand, easier to use. Which will help to make tests easier to read and maintain. It is not tied to any particular test framework, so it can be used equally well in a unit testing or from a plain ‘main’ method. So here we will start with WebDriver’s API.

Every supported browser has its own driver class implementation. Here we will have some examples on how to use those different browsers.

Firefox:
FirefoxDriver is part of WebDriver itself.

public void startFirefoxBrowser()
{

WebDriver driver = new FirefoxDriver();

driver.get("https://testingchronicle.wordpress.com/");
System.out.println(driver.getTitle());

driver.quit();

}

Internet explorer:
InternetExplorerDriver is a separate executable. We need to download this.We can get it from https://code.google.com/p/selenium/downloads/

public void startIEBrowser()
{
System.setProperty("webdriver.ie.driver",this.getClass().
getClassLoader().getResource("IEDriverServer.exe").getPath());

WebDriver driver = new InternetExplorerDriver();

driver.get("https://testingchronicle.wordpress.com/");
System.out.println(driver.getTitle());
driver.quit();

}

Chrome:
ChromeDriver is a separate driver executable, maintained by the Chromium team. Similarly we need to download this.We can get it from https://code.google.com/p/selenium/downloads/

public void startChromeBrowser()
{

System.setProperty("webdriver.chrome.driver", this.getClass().getClassLoader().getResource("chromedriver.exe").getPath());

WebDriver driver = new ChromeDriver();

driver.get("https://testingchronicle.wordpress.com/");

System.out.println(driver.getTitle());

driver.quit();

}

HTMLunit driver:
We dont need any driver executable for HTML unit driver.

public void htmlUnitDriver()
{

WebDriver driver = new HtmlUnitDriver();

driver.get("https://testingchronicle.wordpress.com/");

System.out.println(driver.getTitle());

driver.quit();

}

Remote driver:
We need to use RemoteWebDriver if we have to make use of Selenium Grid (Browsers which might be located elsewhere).
Using the RemoteWebDriver have some disadvantages, like external servlet needs to be running and it introduces extra latency to our tests.

public void remoteDriver() throws MalformedURLException
{

DesiredCapabilities cap = DesiredCapabilities.firefox();

WebDriver driver = new RemoteWebDriver(new URL(
"http://localhost:4444/test/app"), cap);

driver.get("https://testingchronicle.wordpress.com/");

System.out.println(driver.getTitle());

driver.quit();

}

Happy Automating 🙂
How to locate an element on the page

Locating the correct element to interact with is the biggest challenge when developing real-browser testcases.When you encounter an Element Not Found error when replaying a real-browser testcase.Mastering element location makes everything else easy.

What is an Element?
Everything you see on the page is an element.Every field, link, image, text and many things you don’t see are all elements. An element is equivalent to a tag in HTML,though there can be elements on a page that did not come from the HTML source.

What is an Element Locator?
An element locator, usually referred to as simply a locator, is a method for finding an element on a page. There are many different types of locators.Deciding which one to use depends on a lot of different factors and there is no correct answer other than the one that works for you. In many cases, several different locators could all be used to accomplish the same task.

There are two ways:

–Any step that was recorded in the browser will have a locator created by the recorder
–You can configure locators manually in the UI for any step. This is required for manually-created steps.

Why did the locator fail:

Before you can configure a better locator, it is important to first understand why the locator failed. In some cases, the problem might not even be with the locatos.so changing the locator would not help.
Here are some of the common causes.

–Element attributes changed in a way that invalidated the locator strategy
–Element does not exist (yet)
–Element not visible/click-able
–Testcase proceeding too fast
–Element is in an IFrame

Find and inspect the element:
We need to know what we are working with –so the next step is always to look at the element in the page to see what other properties it has that we can use to identify it.The browser(or a plugin) will help you do that.

Choose a new locator:
After inspecting the element and the surrounding elements, this example provides several ways we could try to locate this element.

Ways for Finding web Elements:

1) by name attribute
For example to find element whose code look like this
input type=”button” name=”name-012″ value=”Name-Button”

someElement = driver.findElement(By.name("name-012"));

2) by ID attribute
For example to find element whose code look like this
input type=”button” id=”id-012″ value=”ID-Button”

someElement = driver.findElement(By.id("id-012"));

3) by Class Name
For example to find element whose code look like this

div class=”shape”
span ‘circle’ /span
/div
div class=”shape”
span ‘square’ /span
/div

elementList = driver.findElements(By.className("shape"));
for(WebElement e:elementList)
{
System.out.println("" + e.getText());
}

4) by Tag Name
For example to find element whose code look like this “title Automation Testing /title”

someElement = driver.findElement(By.tagName("title"));

5) Find the web element by Link Text
For example to find element whose code look like this
a href=”http://www.google.com/search?q=Automationtest”>Automationtest

someElement = driver.findElement(By.linkText("whiteboxtest"));

6) by Partial Link Text
For example to find element whose code look like this
a href=”http://www.google.com/search?q=hello”>search hello

someElement = driver.findElement(By.partialLinkText("hello"));

7) by CSS
For example to find element whose code look like this

div id=”food”
span class=”dairy” ‘milk’ /span
span class=”dairy aged” ‘cheese’ /span
/div

someElement = driver.findElement(By.cssSelector("#food span.dairy.aged"));

8) by XPath

This is the most powerful mechanism to locate web UI element.Locating a element should be avoided by id or name if the dynamic id generated at runtime.
Firebug and Firepath are the tools used to extract Xpath of an element.

For example to find element whose xpath value is .//*[@id=’food’]/span[1]

someElement = driver.findElement(By.xpath(“.//*[@id=’food’]/span[1]”));

Happy coding 🙂

Locating web elements by XPath

What is Xpath?

Xpath is a query language for selecting nodes from an XML document.While DOM is the recognized standard for navigation through an HTML element tree, XPath is the standard navigation tool for XML.XPath is used everywhere where there is XML. XPath is a very powerful language to express which element to identify.If you use it correctly, it can produce very reliable and low maintenance locators, but if you use it incorrectly, it can create very brittle test cases.

Pros:
–Allows very precise locators
Cons:
–Slower than CSS
–Relies on browser’s XPath implementation which is not always complete (especially on IE) and as such is not –recommended for cross-browser testing.

Lets go through different ways we can use Xpath to locate elements:

Absolute path:
driver.findElement(By.xpath("html/body/div/p/input"));

Relative path:
driver.findElement(By.xpath("input"));

Special Attributes:

Tag with attirbute value:

driver.findElement(By.xpath("//input[@id='username']"));

Any tag with id:
driver.findElement(By.xpath("//*[@id='itemid']"));

Operator ‘and’:
driver.findElement(By.xpath("//input[@type='submit'][@value='Login'"));
driver.findElement(By.xpath("//input[@type='submit' and @value='Login'"));

Operator ‘or’:
driver.findElement(By.xpath("//input[@type='submit' or @class='Login'"));

Attribute which starts with :
driver.findElement(By.xpath("//input[starts-with(@class,'tbl_')]"));

Attribute which ends with :
driver.findElement(By.xpath("//input[ends-with(@class,'_name')]"));

Attribute contains text:
driver.findElement(By.xpath("//input[contains(@id.'username')]"));

Match value to any attribute:
driver.findElement(By.xpath("//input[@*= 'username')]"));

Ancestor,descendant,following,following-sibling,preceding-sibling:
driver.findElement(By.xpath("//td[text()= 'item 1']/ancestor::table"));
driver.findElement(By.xpath("/table/descedant::td/input"));

Use parent to get to same-hierarchy object:
driver.findElement(By.xpath("//div/input[@class='testLog']/../button"));

Locate element by matching exact text value:
driver.findElement(By.xpath("//td/span[text()='random text"));
or driver.findElement(By.xpath("//td/span[.='random text']"));

See if Elment contains specified text:
driver.findElement(By.xpath("//td[contains(text(),'random text')]"));

Locating web elements by CSS Selectors :

What are Css Selectors ?

The CSS locator strategy uses CSS selectors to find the elements in the page. Selenium supports CSS 1 through 3 selectors syntax excepted CSS3 namespaces.Browsers implement CSS parsing engines for formatting or styling the pages using CSS syntax.

Pros:
–Much faster than XPath
–Widely used
–Provides a good balance between structure and attributes
–Allows for selection of elements by their surrounding context

Cons:
–They tend to be more complex and require a steeper learning curve.

Now lets go through different ways we can use Css Selector to locate elements:

Absolute Path:
driver.findElement(By.cssSelector("html>body>div>p>input"));
Relative Path:
driver.findElement(By.cssSelector("input"));
Regular Attribute:
driver.findElement(By.cssSelector("button[name='cancel']")); (tag with attribute value)

Special Attributes:
ID:
driver.findElement(By.cssSelector("#save"));
Tag and ID:
driver.findElement(By.cssSelector("button#save"));
Class Attribute:
driver.findElement(By.cssSelector(".xyz"));
Tag and Class Attribute:
driver.findElement(By.cssSelector("input.username"));
Tag with Attribute value:
driver.findElement(By.cssSelector("img[pic=abc]"));
Tag which has attribute:
driver.findElement(By.cssSelector("img[pic]"));
Tag which doesnt have attribute:
driver.findElement(By.cssSelector("img:not[pic]"));

The first child of a tag with id:
driver.findElement(By.cssSelector("div#students:first_child"));

The nth child of a tag with id:
driver.findElement(By.cssSelector("form#loginForm:nth_child(5)"));

Second descendent of div with id:
driver.findElement(By.cssSelector("div#ilan>p+ * +p"));

(first) tag which is enabled:
driver.findElement(By.cssSelector("button:Enabled"));

Text-Css Selectors:

See if element’s attribute contains specified text:
driver.findElement(By.cssSelector("div[id*='item_id']");

See if element contains specified text:
driver.findElement(By.cssSelector("input:contains('text')");

innerText attribute:
driver.findElement(By.cssSelector("td[innerText='text']"));

textContent: For FireFox
driver.findElement(By.cssSelector("td[textContent='text']"));

Finally What’s better ? Xpath or css selectors ?
— Css Selctors method is faster
— Browsers them selves use css selectors
— Latest browsers optimize the use of css selctors.

–Xpath – Cummon language for xml/html parsing
–Xpath is a two way search mechanism (up and down the Dom tree)
–Xpath handles the text recognition better.

So according to the requirement lets decide what to use where.

Happy Testing 🙂

Why Automation tests and its benefits:

These days most of the software are written as web-based applications to run in browser. Software projects, especially large and complex ones, require a significant investment in testing to ensure that they are successful.
The main goal in software development processes is a timely release. Automated tests run fast and frequently, due to reused modules within different tests. Automated regression tests which ensure the continuous system stability and functionality after changes to the product.Which were made lead to shorter development cycles combined with better quality software and that is the benefit of automated testing.

Why Selenium Automation and What it does :
Selenium automates browsers. That’s it!!

Selenium is a open-source software testing framework for web applications.It provides a record/playback tool for verifying tests without learning a test scripting language (Selenium IDE). It also provides a test domain-specific language to write testcases in a number of popular programming languages, including Java, C#, PHP, Perl,Python ,Groovy and Ruby. The tests can then be run against most modern web browsers. Selenium deploys on Windows, Linux, and Mac platforms.

Selenium components:

Selenium IDE (Integrated Development Environment)
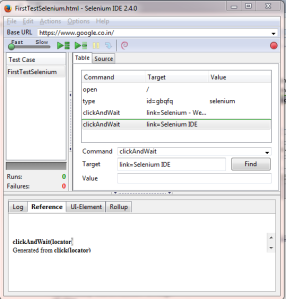
It is a tool for building test scripts. It is a Firefox plugin and provides an easy to use interface for developing automated tests. Selenium IDE has a recording feature, which records user actions as they are performed and then exports them as a reusable script in one of many programming languages that can be later executed.

SeleniumIDE

Selenium RC (Selenium Remote Control)
This is a server, written in Java, that accepts commands for the browser via HTTP. It makes possible to write automated tests for a web application in any programming language. That allows for better integration of Selenium in existing unit test frameworks.

Selenium Web Driver
Selenium Web Driver is the successor to Selenium RC. Selenium WebDriver accepts commands and sends them to a browser. This is implemented through a browser-specific driver, which sends commands to a browser, and retrieves results. Most browser drivers actually launch and access a browser application. Selenium Web driver is also know as Selenium 2.0. Selenium Web driver does not need selenium server for running tests and its a modified version of Selenium Core & Selenium RC. As I said you need a programming language to write your tests, will use Java for writing the scripts.
Lets get started with Configuring Selenium web driver with Java:

Step 1: Download Eclipse
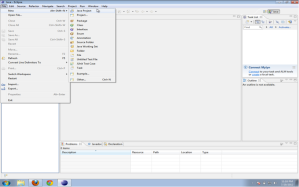
Step 2: Creating a New Java Project in Eclipse IDE

2

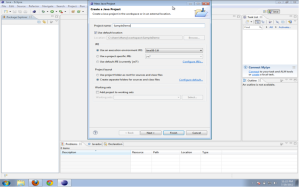
Step 3: Enter a Project Name : SampleDemo

12 (3)
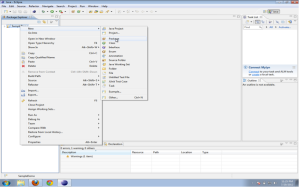
Step 4: Creating a New Package
Right Click on the New Java Project created → New→ Package

12 (4)
Step 5: Type In a New Package Name : selenium.example

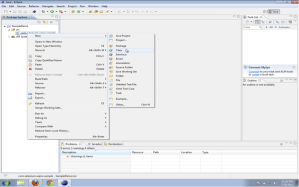
Step 6: Creating a New Java Class file.

Right Click on the Newly created Package → New → Class

12 (6)

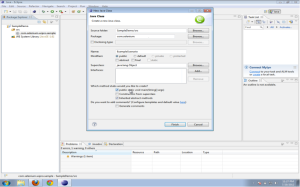
Step 7:Type In a Name for your Java Class file, click on the check box for “public static void main (String args[])”
Click on Finish.

12 (7)

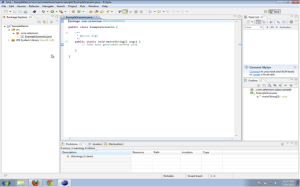
Step 8: The Java class file is created and ready for Java Scripting.

12 (8)
Now, We need to add the Selenium Library files to our project.

Step 9: Download the selenium server from the seleniumhq.org website.

http://www.seleniumhq.org/download/
Step 10: Save the jar file in a specific Location lets say C:/Selenium
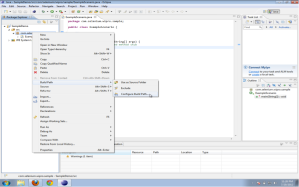
Step 11: Configuring Build Path.
Right Click on the package → Build Path → Configure Build Path

12 (1)
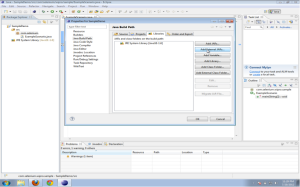
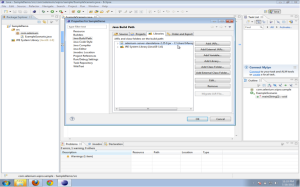
Step 12: Click on Libraries tab → Add External Jar’s

12 (9)
Step 13: The jar files should be loaded from the (C:/Selenium) folder where you have saved the downloaded Jar file from Seleniumhq website.

12 (10)

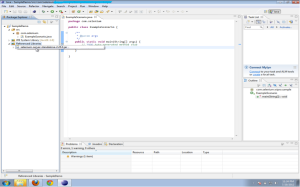
Step 14:We can also verify by expanding the Referenced Libraries in the Project Explorer that, whether the Jar file is added properly.
Step 15: Now, our Eclipse is ready for Selenium Scripting.

12 (11)
Web Driver object initialization as WebDriver driver=new FirefoxDriver();
Step 16: Now Mouse Hover near the Firefox Driver, and you will get an auto suggest option.
Now ,click on the Import FirefoxDriver option the suggested list
import org.openqa.selenium.WebDriver;
import org.openqa.selenium.firefox.FirefoxDriver;

And, that’s it we are done with Selenium Project setup in Eclipse.

Happy testing !!